Sunday, October 30, 2011

Loose Ends

Because this is our only real experience working with straw bale walls, I’m only guessing when I say most of those walls meet at corners. Hence, we wouldn’t typically see the ends of any bales in an interior wall. We would usually see them at the exterior corners of the house where those ends could be easily covered with plaster.
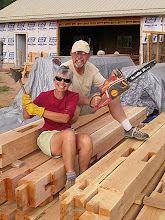
Our house, with its “T” shape has four places where the end of a bale wall can be seen inside the house. These also happen to be the places where much of the electrical wiring has been placed as can be seen in this photo.

Looking closely at the bales, there is a great deal of loosely bound straw plus large gaps between the bales. There are also several large indentations created by pressure the baling twine exerts on the bale to hold it together. In addition, there's that plastic-coated wiring to deal with. All of these things could be big problems when it's time to plaster this section of the wall. Next spring we plan to apply two inches of plaster to all of the interior walls. However, some of the gaps and indentations in these problem areas are as large as 8 inches. What to do?

On the exterior of our house, there were several sections where we used wood lath to cover gaps which we stuffed with straw. It was something of an experiment although we had read about it on-line and in our plaster book. When we plastered the lath, everything went well, so we've decided to attempt the same method on the four problem areas inside the house.

One-inch nailer on left
First Scott nailed a one-inch by one-inch nailer in front of the wiring. Our intent was to provide a surface to which we would nail one end of each piece of lath. We also needed to protect the wiring from being punctured by the nails holding the lath in place.

Working from the floor up, I nailed a few pieces of lath in place, then stuffed straw into the gaps.
Here is the entire section covered with lath.


And a close-up. It seems like this is a surface we'll be able to plaster without any trouble. We'll see the result next spring.

Saturday, October 29, 2011

In The Meantime

When the temperature gets below freezing, making plaster becomes a challenge. The earth is too cold, the water freezes and it’s just plain no fun. So, now that the weather is reaching the low twenties at night and only gets into the fifties during the day, we have transitioned from outdoor to indoor work. Not only has this been a wise move, but it puts smiles on our faces to be inside the house where the solar panels are doing a nifty job of keeping the temperature at a lovely 65-plus degrees. Not only does this warm our bodies, but it warms our hearts to know that we aren’t sending our pennies to the utility company. Good old Sol has our back.

Our first indoor project was of the cosmetic nature. Last November when Tyler’s crew built our ceiling with the gorgeous beetle-killed ponderosa pine tongue and groove, it was impossible to cut the ends of each plank in such a way as to create a perfect union at the peak of the ceiling. In fact, this goal wasn’t even on the radar in as much as Scott and I had decided to cover the peak of the ceiling with some, as yet, undecided product. We talked about several possibilities, but we finally decided upon bamboo. You see, we have absolutely fallen in love with that material and are using it wherever we can. The peak of the ceiling was our first opportunity to use it as a decorative accent.

We ordered four-inch, 10-foot long, half-rounds of bamboo from the nice folks at Cali Bamboo. We applied Minwax gel stain to each pole, waited for it to dry and screwed it to the ceiling. The only real challenge was the height which we conquered with a double-decker scaffold.

Gap at peak of ceiling


Gap covered with bamboo half-round
Scott on the scaffold
 Success!