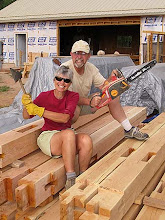
As I have mentioned earlier, one of the interesting aspects of strawbale construction is learning how to solve problems. I'm guessing that folks with years of building experience could have avoided many of the problems we've had the pleasure to unravel, but now we have one more under our belts.
Two years ago when we installed the sill plates for the bales of straw to sit on, we didn't have a clear picture of how those plates would be integrated into the interior walls. Now that we have moved on to plaster preparation, we discovered that we should have set the sill plates farther back from the doorways.
Here you can see the 4 X 4 treated-wood sill plate beneath the bale wall. The door is visible on the right. Two inches of plaster will eventually be applied to the wall as well as to the sill plate. We also need to put trim around the door. It is clear that there won't be enough room for the plaster and the door trim. In addition, Scott and I want bull-nosed corners on all of the walls. How will that work on a square sill plate?
Earlier we had purchased a handy Dremel Multi-tool. It is great for sanding tight corners. Its small saw feature can also be used instead of a chisel and mallet. Scott went to work and cut away two inches of sill plate and we now have room for plaster and trim. The cement under the sill plate is rough and unstained, but now we have another opportunity for a design detail. More on that when we've figured it out.
Showing posts with label foundation. Show all posts
Friday, January 6, 2012
Sunday, July 4, 2010
Three and a Half Inches
Even though progress is slow, we have incremental successes. Before we can our stack straw bale walls, we want our foundation to be well-insulated and protected, so we covered the sides of it with two-inches of pink, solid, Owens Corning insulation. Next we placed 12-inch by 12-inch slate tiles all around the top of the foundation and painted any pink insulation showing below the tiles with asphaltic emulsion. This emulsion will keep the insulation from breaking down. Eventually only six inches of the slate tiles will show but they will be a nice design feature.
We must also create a barrier between any possible moisture and the straw. To do this we painted the top of the foundation with asphaltic emulsion and placed tar paper on top of it. Then we anchored 4 X 4 inch boards on each side of the 18-inch foundation for the sill plate. (This site has many definitions that help understand terms used in the construction of log homes. While our home isn't exactly a log home, the glossary is useful.) In order to be ready to raise the timber frame, the sill plate must be filled with gravel and the foundation needs to be back-filled. The straw walls will rest on the sill plate.
An aside - Even though lumber companies call the boards 4 X 4 inches, they are actually "nominally" that size. That means the boards are really only 3 1/2 X 3 1/2 inches. Once the sill plate was in place, our house was 3 /12 inches taller. Hooray! A small victory. The next upward step should be a big one...15 feet of timber frame.
Post Options
Sunday, November 22, 2009
How Firm a Foundation
When people find out we’re building a house of straw, their first reactions include incredulity and a few jokes about the big bad wolf. Once they realize we are serious, that disbelief turns to interest, and soon they’re asking questions. "What do you cover the straw with?" "How do you keep the straw dry?" If they know a little about construction and then a just bit about straw, they say, "That's going to be a huge foundation!" Yes, indeed, it will be, and we tackled that foundation this summer.
Since the bales we plan to use will be eighteen inches wide, that means we’ll need a foundation that is also eighteen inches wide. The frost line in Torrey is 30 inches below the earth’s surface. That means we need a foundation measuring 18” wide and 36” - 40” high all around the approximately 150-foot perimeter of the house that will be constructed with bales of straw. That’s A LOT of concrete. To reduce that amount, we opted to build a rubble trench foundation.

To begin preparing the house site, Scott mowed the meadow grass. (We aren’t big fans of mowing or lawn. This might be one of the only times I’ll ever see Scott use a lawn mower.) Then Tyler Torgersen brought in his crew to remove the top soil. Next the crew dug a narrow trench at the house’s perimeter. They positioned perforated pipe throughout the trench. The pipe’s purpose is to drain any moisture away from the foundation. Typically the pipe runs to daylight. Our property doesn’t have much slope, so, rather than going to daylight, our perforated pipe goes to a dry well that is eight feet by eight feet down to about five feet below the surface where the ground water runs. They filled the trench and dry well with gravel. Finally the crew poured about two feet of foundation concrete.
This is where we left our house for the season. It felt grand sitting in the “living room,” looking at the Cock’s Comb to the south and toasting our good fortune.
Since the bales we plan to use will be eighteen inches wide, that means we’ll need a foundation that is also eighteen inches wide. The frost line in Torrey is 30 inches below the earth’s surface. That means we need a foundation measuring 18” wide and 36” - 40” high all around the approximately 150-foot perimeter of the house that will be constructed with bales of straw. That’s A LOT of concrete. To reduce that amount, we opted to build a rubble trench foundation.

To begin preparing the house site, Scott mowed the meadow grass. (We aren’t big fans of mowing or lawn. This might be one of the only times I’ll ever see Scott use a lawn mower.) Then Tyler Torgersen brought in his crew to remove the top soil. Next the crew dug a narrow trench at the house’s perimeter. They positioned perforated pipe throughout the trench. The pipe’s purpose is to drain any moisture away from the foundation. Typically the pipe runs to daylight. Our property doesn’t have much slope, so, rather than going to daylight, our perforated pipe goes to a dry well that is eight feet by eight feet down to about five feet below the surface where the ground water runs. They filled the trench and dry well with gravel. Finally the crew poured about two feet of foundation concrete.This is where we left our house for the season. It felt grand sitting in the “living room,” looking at the Cock’s Comb to the south and toasting our good fortune.
Sunday, July 5, 2009
A Garage - Step One

The first week of June felt like another beginning. That’s because Tyler Torgerson (Double T Construction) and his crew of three (Darren, Jed and Mel) arrived with backhoe in tow ready to start building our garage.
Even though I had spent much of my childhood playing around the many job sites my dad supervised, I never really observed the actual construction going on. I have to admit it was a little disconcerting to see even a small corner of our smooth, green pasture disappear under a construction zone. Here are the steps to this transformation.
1) With a backhoe, clear the topsoil from the site.
2) Using a laser level, position batter boards to create a perfect rectangle for garage's footprint.
3) Dig trenches for footings.
4) Place forms and rebar in trenches.
5) Cement truck arrives.
6) Pour cement into forms.
7) Screed concrete to create a flat surface for stem wall.
8) Wait for concrete to set.
9) Remove forms from footings.
10) Erect forms for stem wall.
11) Insert and tie together rebar to reinforce stem wall.
12) Have inspector approve foundation prep.
Since this was a short trip, this is all we saw of the foundation work.
While Double T did their job, Scott and I worked on other projects. We finished laying carpet and vinyl in the yurt. To create a kitchen, we assembled a buffet / cabinet with a counter large enough to hold a camping stove and cutting board. The “kitchen” also contains a trash pail, large cooler (refrigerator) and picnic basket (pantry). Next we stalled propane for the stove and a light, brought in our futon and set our camp table and chairs in place. This really made a wonderfully comfortable living arrangement. The first night in the now basically furnished yurt, we realized this was the best “hut” either of us had ever made. If fact, almost simultaneously, Scott and I wondered why we needed a house. However after a few cold nights and hot days, we knew there was something to be said for solid, insulated walls to keep the cold away and the heat at bay.
Sunday, May 31, 2009
A Solid Foundation
During the last week of April, Scott spent four solo days in Torrey. He was hard at work leveling the ground on the yurt site. This involved lots of shovel time removing pasture grass under the stands that would soon support the floor. He spent even more time pounding duck-billed tie downs into the VERY HARD and ROCKY ground in order to secure the whole structure in place. While Scott was shoveling and pounding away, the folks at the local building supply company, Loa Builders, delivered the beams for the floor joists as well as the 1 1/8 inch subflooring.
Because we have no power lines, the only real problem was getting electricity to the site. That was easily solved because Dad was able to lend us his generator. The next steps - positioning the joists and laying the subfloor - just needed muscles, time and persistence. The final part of this phase was to accurately cut the platform into a circle the same diameter as the yurt - 20 feet. Scott accomplished this by determining a center, marking it with a nail and attaching to that nail a length of string equal to the circle's radius - 10 feet. Pivoting the string around the nail, he carefully drew a circle on the platform. Finally he used a jigsaw to cut away the excess wood producing the circular floor we needed. VoilĂ ! By the time Scott left Torrey, everything was set for the official yurt raising which would occur one week later.
Subscribe to:
Posts (Atom)