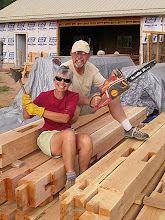
Now that the weather keeps us indoors, we devote our time to interior work. Some of the projects require two full-time workers - plastering or window trim for example. Other projects require one full-time person (usually Scott) and occasionally a second person (usually me) to hold a piece of wood in place while the other wields the nail gun for a moment or to hold one end of the tape measure while the other reads the smart end. During the off-duty moments, the second person (me) needs to make herself useful, so I’ve been nailing lath to the framing of our interior walls.
Anyone familiar with conventional construction might wonder why in the world we’re using lath. That same person would know that the logical next step to a lath wall is plaster...hence the term “
lath and plaster walls.” In today’s construction world, lath and plaster has been mostly replaced with solid drywall which is faster and less expensive to install. But, as we have seen with the change in our construction time line, we apparently are not worried about faster (even though being finished with this house before we’re 60 would be nice). Traditional lath and plaster walls require skilled plasterers to apply three coats of plaster over a framework of lath strips. By the time we are actually finished, we’ll probably be able to hire out as skilled plasters. And, since solid dry wall is, well, solid, it’s not the best material for making curved walls with the handmade look we so admire. Hence the process begins.
During our Thanksgiving stay I was able to put up the lath on one side of the walls separating the main living space of our house from the bedroom and from Scott’s office. We can more easily see the space we will soon be living in.
 |
| Looking from the living room into the bedroom |
 |
| The other side of the same wall |
 |
| Looking from the bedroom into the living room |


No comments:
Post a Comment