Sunday, November 22, 2009


Basics
This blog is called “Our House of Straw.” So far, however, we’ve said nothing much about straw. That’s because this first season has been one of preparation. We needed a few basics before we could begin the straw features of our house: road, water, electricity, temporary housing, an enclosed work space.
Our goal is to do as much work as possible using our own puny skills, but, in some instances, it has been necessary to rely upon the expertise of our many skilled neighbors. All of the cement work and the framing of the garage are prime examples. As Wayne, our architect, explained, building a garage of straw is a rather pointless use of time and materials. The footprint alone for a straw bale garage presented a good argument for traditional construction. It wouldn’t be a heated structure, and we would only ever use it as work and storage space. That’s why Double T Construction was employed.
Still, we want the exterior of the garage to closely match the earthen plaster exterior of our house. Wayne built three structures on his property in Driggs, Idaho: his straw bale home, plus a garage and a workshop that are built with traditional stick framing. To finish the exterior of the garage and workshop, Wayne used a technique that was very common prior to the introduction of drywall - lath and plaster.
This process begins with lath, narrow strips of wood nailed horizontally across wall studs. The lath is about two inches wide by four feet long by 1/4 inch thick. Each horizontal course of lath is spaced about 1/4 inch away from its neighboring courses. Once the walls are covered with lath, plaster is applied. The plaster is pushed through the 1/4 inch gaps between each lath which “keys” the plaster to the lath.
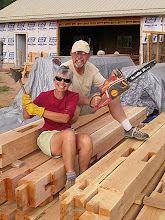
We thought it would be a simple undertaking to locate lath, but it turned into a quest. After calling many possible sources, we finally found enough lath for the project at the Home Depot in Richfield, seventy miles from Torrey. As the clerks loaded the bundles of lath onto our flatbed trailer, they asked what we planned to do with it all. After they heard the explanation, one fellow laughed and said, “They invented drywall to get away from this.” I don’t think he shared our vision.
One of the last projects of this first season was covering the exterior of our garage with lath. Now it sits, under a temporary wrap of Tyvek, waiting its future handsome coat of plaster.
Our goal is to do as much work as possible using our own puny skills, but, in some instances, it has been necessary to rely upon the expertise of our many skilled neighbors. All of the cement work and the framing of the garage are prime examples. As Wayne, our architect, explained, building a garage of straw is a rather pointless use of time and materials. The footprint alone for a straw bale garage presented a good argument for traditional construction. It wouldn’t be a heated structure, and we would only ever use it as work and storage space. That’s why Double T Construction was employed.
Still, we want the exterior of the garage to closely match the earthen plaster exterior of our house. Wayne built three structures on his property in Driggs, Idaho: his straw bale home, plus a garage and a workshop that are built with traditional stick framing. To finish the exterior of the garage and workshop, Wayne used a technique that was very common prior to the introduction of drywall - lath and plaster.
This process begins with lath, narrow strips of wood nailed horizontally across wall studs. The lath is about two inches wide by four feet long by 1/4 inch thick. Each horizontal course of lath is spaced about 1/4 inch away from its neighboring courses. Once the walls are covered with lath, plaster is applied. The plaster is pushed through the 1/4 inch gaps between each lath which “keys” the plaster to the lath.
We thought it would be a simple undertaking to locate lath, but it turned into a quest. After calling many possible sources, we finally found enough lath for the project at the Home Depot in Richfield, seventy miles from Torrey. As the clerks loaded the bundles of lath onto our flatbed trailer, they asked what we planned to do with it all. After they heard the explanation, one fellow laughed and said, “They invented drywall to get away from this.” I don’t think he shared our vision.
One of the last projects of this first season was covering the exterior of our garage with lath. Now it sits, under a temporary wrap of Tyvek, waiting its future handsome coat of plaster.
How Firm a Foundation
When people find out we’re building a house of straw, their first reactions include incredulity and a few jokes about the big bad wolf. Once they realize we are serious, that disbelief turns to interest, and soon they’re asking questions. "What do you cover the straw with?" "How do you keep the straw dry?" If they know a little about construction and then a just bit about straw, they say, "That's going to be a huge foundation!" Yes, indeed, it will be, and we tackled that foundation this summer.
Since the bales we plan to use will be eighteen inches wide, that means we’ll need a foundation that is also eighteen inches wide. The frost line in Torrey is 30 inches below the earth’s surface. That means we need a foundation measuring 18” wide and 36” - 40” high all around the approximately 150-foot perimeter of the house that will be constructed with bales of straw. That’s A LOT of concrete. To reduce that amount, we opted to build a rubble trench foundation.

 To begin preparing the house site, Scott mowed the meadow grass. (We aren’t big fans of mowing or lawn. This might be one of the only times I’ll ever see Scott use a lawn mower.) Then Tyler Torgersen brought in his crew to remove the top soil. Next the crew dug a narrow trench at the house’s perimeter. They positioned perforated pipe throughout the trench. The pipe’s purpose is to drain any moisture away from the foundation. Typically the pipe runs to daylight. Our property doesn’t have much slope, so, rather than going to daylight, our perforated pipe goes to a dry well that is eight feet by eight feet down to about five feet below the surface where the ground water runs. They filled the trench and dry well with gravel. Finally the crew poured about two feet of foundation concrete.
 This is where we left our house for the season. It felt grand sitting in the “living room,” looking at the Cock’s Comb to the south and toasting our good fortune.
Since the bales we plan to use will be eighteen inches wide, that means we’ll need a foundation that is also eighteen inches wide. The frost line in Torrey is 30 inches below the earth’s surface. That means we need a foundation measuring 18” wide and 36” - 40” high all around the approximately 150-foot perimeter of the house that will be constructed with bales of straw. That’s A LOT of concrete. To reduce that amount, we opted to build a rubble trench foundation.

 To begin preparing the house site, Scott mowed the meadow grass. (We aren’t big fans of mowing or lawn. This might be one of the only times I’ll ever see Scott use a lawn mower.) Then Tyler Torgersen brought in his crew to remove the top soil. Next the crew dug a narrow trench at the house’s perimeter. They positioned perforated pipe throughout the trench. The pipe’s purpose is to drain any moisture away from the foundation. Typically the pipe runs to daylight. Our property doesn’t have much slope, so, rather than going to daylight, our perforated pipe goes to a dry well that is eight feet by eight feet down to about five feet below the surface where the ground water runs. They filled the trench and dry well with gravel. Finally the crew poured about two feet of foundation concrete.
Saturday, September 26, 2009
On Our Own

We’ve been back in Torrey a little over two weeks now. We wanted to complete some of the timber frame work - as much as was possible for two novices working on their own. We discovered that’s what we truly are. In all of this time we’ve only completed three trusses. That means we’ve used a grand total of 18 pieces of timber. That’s including the six we used when Adam and Jake were here.
Just when we thought we were doing great, we’d make a mistake...cut a line we should have erased, made a one and one half inch tenon that should have been a two-incher. Yikes! Luckily we will be able to salvage the timbers with those mistakes. There truly is an art to all of this, and we are rank beginners.
 Scott has said from the start, “A big project is like eating a whale. It’s done one bite at a time.” Today he said, “I didn’t know this was going to be a blue whale!” I guess he was hoping for a minke.
Now I’ve got to go back to work, but in October Scott plans to be here two more times on his own. He hopes to work on posts, girts and braces. I’ll return one more time before Halloween...the end of this year’s building season. The week I’m here, we’ll put the lath on the exterior of the garage. (When we plaster the garage, that will be practice for our house.) That week we’ll also ready the yurt for winter (basically put the scaffolding back in place to help support a snow load).

When we get back to Logan, we’ll begin making lists for the next building season. A BIG plus for us...Shanna and Doug (Scott’s sister and her husband) are going to be here next summer to lend much-need helping hands. Hooray!
Saturday, September 12, 2009
Are We Making Any Progress?
For the last four days, we have been working on timbers all by ourselves. The cutting is slow, very slow. One truss has six parts. After 4 1/2 man-days, we’ve only completed one part, the bottom chord. At this rate, it’s had to imagine that we’ll ever be finished.
I decided to go back to our original timetable and see if we are making any progress at all. This review buoyed my spirits because I discovered that we really are on schedule.
1) The road is in.
2) The foundation was completed yesterday.
3) Fencing and waterlines have been relocated.
4) The garage is done except for the outside facade.
5) We’ve begun the timberframe.
And despite today’s slow going, we’re certain to get faster and, eventually, done.
I decided to go back to our original timetable and see if we are making any progress at all. This review buoyed my spirits because I discovered that we really are on schedule.
1) The road is in.
2) The foundation was completed yesterday.
3) Fencing and waterlines have been relocated.
4) The garage is done except for the outside facade.
5) We’ve begun the timberframe.
And despite today’s slow going, we’re certain to get faster and, eventually, done.
Thursday, September 10, 2009
Why the Fuss Over a Garage?
Because Scott and I actually live in Logan, we needed to find a way to frugally live in Torrey during construction season. The best solution for us was to build our yurt, then erect the garage so we’d have a place to work out of the weather and so we’d have easy access to a bathroom.
Once the bathroom was in working order, it was good-bye to the Texaco station and hello to the next phase of house construction - the timber frame. To that end, Bruce Chappel (Thousand Lakes Timber Company) delivered the timbers for our entire house except for the porch. The very next weekend, Adam Riley and Jake Amadon (Teton Timber Framing Company) arrived on the scene to give us an intensive, one-on-one, three-day, crash course in the timber frame process.
If you remember an earlier posting, Scott and I had participated in a timberframe workshop through the Traditional Building Skills Institute at Snow College. But this time we were the only students and we were building our very own home.
As you can see in the following slide show, timber framing is an art form requiring precision, patience and good partners. We had all three! And the garage will be perfect for continued work in all kinds of weather!
Once the bathroom was in working order, it was good-bye to the Texaco station and hello to the next phase of house construction - the timber frame. To that end, Bruce Chappel (Thousand Lakes Timber Company) delivered the timbers for our entire house except for the porch. The very next weekend, Adam Riley and Jake Amadon (Teton Timber Framing Company) arrived on the scene to give us an intensive, one-on-one, three-day, crash course in the timber frame process.
If you remember an earlier posting, Scott and I had participated in a timberframe workshop through the Traditional Building Skills Institute at Snow College. But this time we were the only students and we were building our very own home.
As you can see in the following slide show, timber framing is an art form requiring precision, patience and good partners. We had all three! And the garage will be perfect for continued work in all kinds of weather!
Friday, August 28, 2009
The Texaco
When we first contemplated living arrangements in Torrey, we knew restroom facilities would be a challenge. Luckily for us, there is a Texaco service station one mile from the yurt. Jesse, the owner of the Texaco station, didn’t seem to mind our daily visits, but some days that one mile seemed pretty far away. So one of the reasons for building the garage before the house was to provide a toilet and sink for ourselves and work crews plus any visitors that dropped by. Once the septic system was in, this became the next priority.
The interior of the garage was basically finished by the end of July: walls sanded and stained; man door in; outlets, switches, lights, garage door all installed. Three weeks ago we put up the interior walls of the bathroom and hung the door. Next we inserted insulation between the studs and put the exterior walls of the bathroom in place. All of this was done in anticipation of Phillip Winter’s arrival. (He’s our plumber.) We had previously arranged for him to put in two sinks - the porcelain sink in the bathroom and the salvaged stainless steel sink in the workstation in the southwest corner of the garage.
But we were going to purchase and set the toilet ourselves. And that’s where we hit our next snag. Phillip had placed the sewer hole for the toilet based on 2 X 4 construction. Our contractor had framed the bathroom using 2 X 6s. This mixup became apparent as we attempted to lower the toilet into position. The wall was too close to the hole! There wasn’t enough room for the toilet to fit!
After a conversation with Phillip, we learned this was a fairly common and easily solved problem. But, at the moment, it was no consolation since that meant the Texaco station was still in our future.
We spent the next week in Logan running errands which included returning the toilet. We didn’t have to explain to Lowe’s that it was too big. They just refunded our money...no questions asked. Meanwhile Phillip brought in a toilet that fit in a snug space. When we returned, we were very happy to see ...
 It has been christened “The Texaco.”
The interior of the garage was basically finished by the end of July: walls sanded and stained; man door in; outlets, switches, lights, garage door all installed. Three weeks ago we put up the interior walls of the bathroom and hung the door. Next we inserted insulation between the studs and put the exterior walls of the bathroom in place. All of this was done in anticipation of Phillip Winter’s arrival. (He’s our plumber.) We had previously arranged for him to put in two sinks - the porcelain sink in the bathroom and the salvaged stainless steel sink in the workstation in the southwest corner of the garage.
But we were going to purchase and set the toilet ourselves. And that’s where we hit our next snag. Phillip had placed the sewer hole for the toilet based on 2 X 4 construction. Our contractor had framed the bathroom using 2 X 6s. This mixup became apparent as we attempted to lower the toilet into position. The wall was too close to the hole! There wasn’t enough room for the toilet to fit!
After a conversation with Phillip, we learned this was a fairly common and easily solved problem. But, at the moment, it was no consolation since that meant the Texaco station was still in our future.
We spent the next week in Logan running errands which included returning the toilet. We didn’t have to explain to Lowe’s that it was too big. They just refunded our money...no questions asked. Meanwhile Phillip brought in a toilet that fit in a snug space. When we returned, we were very happy to see ...
 It has been christened “The Texaco.”
Subscribe to:
Posts (Atom)



 Posts
Posts