Monday, May 26, 2014

More Fence

Our together trip to Torrey brought big changes to the landscaping.

The first thing we completed was the installation of the remainder of the treated posts that would be visible around the house as well as stretching the rest of the woven fence.

Looking back at Scott's proof-of-concept photo from his previous trip, we decided two rails, one at the top and one at the bottom of the wire would be sufficient to prevent the llamas from chewing on the shrubbery. Removing the middle rail would minimize obstructions to our views.

This is the west side of the house, the side from which the prevailing wind blows. Torrey is in Wayne County. Some folks (us included) often refer to it as Wind County because the wind does blow – and it is strong and frequent. We planted these Big Tuna Mugo Pines to create a wind break. In a few years, they should be between eight and twelve feet tall, a good separation between us and the blast.

We needed to build another fence to screen the propane tank from view. One day, while driving through the avenues in Salt Lake,  I passed a yard surrounded by a beautiful bamboo fence. Since we already were attracted to the material, and because it was so lovely, we decided that would be a perfect screen for our propane tank.

The tank...

screened from view...

and from the porch.

A third fence, on the north side of the house but out of view, will divide the orchard from the rest of the yard. This fence does not need to be beautiful because we won't see it, but it does, once again, need to keep the llamas in their place.


Cedar posts with smooth wire (not yet strung) are just the thing.

During this trip, we had just enough time to hang a bit of decoration outside Scott's office door...

before the snow storm hit.

This was probably more snow than Torrey received during the entire winter. Then it was time to head back to Logan.

Fences

When you have livestock, you need good fences. And when your neighbors have livestock as well, you need really good fences.

We have llamas, three burly guys who haul camera and camping gear into the wilderness backcountry for us. Stegner, Arion and Charlie work hard for part of the year but basically eat and loll about when they are off duty. Llamas aren't pushy fellows when it comes to fences, but, because they do enjoy nibbling on landscape plants, we need a fence to separate their space from ours.

After considering many possibilities and weighting the costs of each, we decided the best option for us would be a fence made from treated posts and woven wire. Since our household is arriving in Torrey soon, and llamas and cats are part of "we," the fence needed to already be in place on moving day.

In late April, knowing we would both return in early May to continue the project, Scott ordered and received fence-building materials and began.

The first thing to arrive was an auger for Orangejello, our tractor. I'm sure we could have dug post holes by hand, or hired a young, strong and spry person to dig them for us, but I've learned from Scott that you can never have too many tools, and the convinced me that the auger was a new tool we absolutely needed. (He was right.)

Scott placed posts on the south side of the house.

He stretched enough woven wire to make sure the concept would work...

put three rails in place, took a photo to document the concept and returned home to Logan, looking forward to our return in two weeks to continue working together.

One More Coat

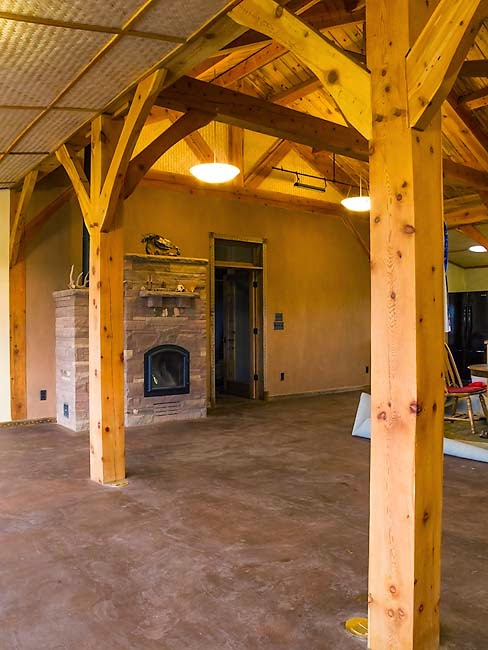
We've been told that we would know when the earthen floor had enough linseed oil. Now we know the truth of it because, during our April visit, the floor seemed dull and dry. Scott suggested that we apply one more coat of oil  just before we returned to Logan.

To that end, we removed most of the furniture from the main living room, folded the rug up around the table and went to work.

To keep oil from splashing on the walls, Scott applied it around the perimeter of the room using a small brush.

He used a paint roller on a long handle for the rest of the room.

This should be the last coat it will need for a while.

When the oil dries, the floor will not be this shiny, but it will have the vibrancy it lacked.

A Small Project

Finally, our three-year turned  five-year plan is drawing to a close. Scott and I often find ourselves looking around our house of straw, wondering how it all happened. Did we really undertake the building of a home, under our own direction? And can it be possible that a moving van will arrive at our Logan house on June 4, load up the belongings we haven't yet moved and whisk everything away to meet us in Torrey? Indeed, the answer is yes, but there are still many things to be completed.

One of those things is the small bathroom in Scott’s office. We had to leave it unfinished (straw and lath walls – just a toilet and a sink) until the end because we needed the plumbing while we were completing the rest of the house. It was the only room that could provide hot water and heated restroom facilities during construction. Now, as moving time draws near, we are reminded of our large project as we repeat it on a much smaller scale in this one room.

It's comforting to begin work in this space, knowing that, this time, we actually know how it should be done.

First I make the straw wall as vertical and flat as possible by removing bulges in the bales.

There is a large hole in one bale, which Scott fills with cob - a thick mixture of clay and straw.

Scott applies slip by hand.


When we plastered the rest of the house, we used a stucco sprayer powered by a compressor. Due to the small size of this bathroom, hand application seemed more appropriate and not very time consuming. Plus, it was much less messy than the sprayer. We were happy with this option since the house is essentially done, and we didn't want to cover our finished walls and floors with new plaster.

Still, we covered the posts and knee braces with painter's tape and plastic to keep mud off of the wood.

Scott applied the scratch coat next, filling in holes in the straw and covering the bamboo poles as he went.

This is the section of wall you see above, but now the large hole is gone and the bamboo is covered.

Using a metal comb (which we call a plaster scratcher), Scott scarifies the finished surface of this first coat of plaster.

This texture, or key, makes it possible for the next coat of plaster to stick to the scratch coat.

 We put finishing touches on the lath around the water pipe and the drain access...

and attach diamond lath to the wall for the pocket door.


The major work of this room is finished. It seems a little strange to say that the "only" things left are applying final plaster coats, painting the walls, covering ceiling with bamboo matting, building a sink cabinet and, finally, reinstalling the sink and toilet. We estimate it will take a week to ten days from this first plaster to the installation of fixtures. A small project indeed.

Saturday, January 25, 2014

The Return of Doug and Shanna

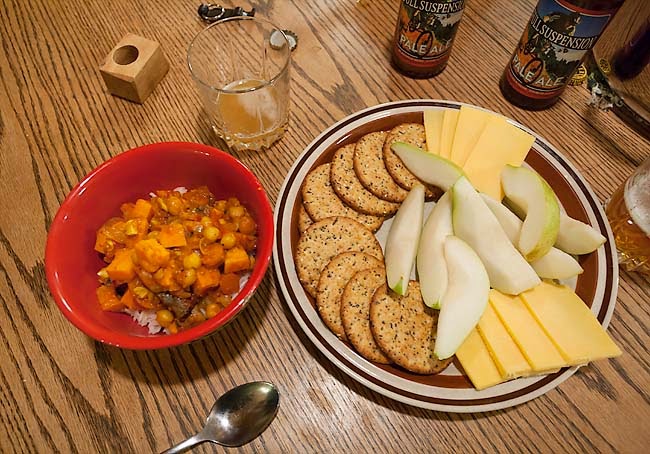
When Doug and Shanna visit, everyone is happy, not only for their great company and their wonderful help with construction, but the food really improves.


Storage Loft

-->
From the floor to the peak of the king post trusses, the interior height of our house is about sixteen feet.  In a living room, that creates the open feeling we wanted to achieve with the timber frame design. However, with ceilings that high, the proportions of smaller rooms like a bathroom or closet would have been all wrong. Taking a shower or changing clothes in that space would have felt like standing at the bottom of a very deep well. So, rather than leaving those rooms open to the peak of the king trusses, we decided to lower the ceiling of those rooms to ten feet.

Not only have these lowered ceilings made us feel less like trespassers in the Jolly Green Giant’s house, but they have also provided a vast amount of storage space for things that we’ll only use once or twice a year. That would be luggage or Christmas decorations or empty wine bottles waiting to be refilled. Basically everything that is stored in the crawl space under the house in Logan will eventually be above the bathroom and closet in Torrey.
Scott felt this storage loft needed a partition to screen these items from view.  To that end, we, once again, employed one of our favorite materials, bamboo, which was left over from a previous project.

The loft before the screen
The frame of the gate to the loft
The loft with the screen and the gate

Bill Ellzey Book Case

-->
Many years ago Scott and I traveled to the eastern Sierra Nevada, south of Mono Lake, for a gathering of professional photographers. There we had the pleasure of meeting  Bill Ellzey, a photographer based in Crestone, Colorado. One night as we sat around the campfire telling stories, Bill mentioned that he had built a strawbale house. Scott and I perked up our ears at this because we had recently begun reading about strawbale construction and wanted to know more about Bill’s experience. He had brought a photo album showing his house, so the three of us spent several hours pouring over the pictures and talking.  He was the first person we actually knew who had built and lived in a strawbale house!

When we began researching in earnest, we saw Bill’s house featured in one of our strawbale books. One photo really struck a chord with me, and that was of a bookcase Bill had built. My favorite thing about it was the irregular spacing of the shelves. Some were long and narrow, others short and wide - each space seemingly sized to fit a specific item, including a very large space to accommodate a painting.

I absolutely fell in love with that bookcase and told Scott I wanted something similar to it in our house. Ever since, I’ve been thinking about and designing our very own "Bill Ellzey bookcase," and last weekend we finished it. Using oak plywood and Home Depot vine trim, plus flexible LED light strips, it is better than I ever imagined it could be, and I thank Bill for the inspiration.
A preliminary plan with notes
Because we wanted the plaster wall to show, the bookcase does not have a back. This meant we needed to provide some means to prevent the bookcase from racking from side to side (or from falling over if the Teasdale Fault suddenly becomes active). We drilled holes through the plaster to the two by six studs, then screwed braces to the wall. These braces are aligned with the top of the bookcase and with a middle shelf. These are screwed to the braces, which prevents the bookcase from moving.

Almost everything was built on the floor to ensure the shelves were in the correct place. This made it possible to easily keep shelves parallel, and, best of all, we didn't need to work over our heads.

Next, we set the bookcase in place and screwed the top and middle shelves to the braces. Here you can see the brace under the top shelf.

The oak plywood is 3/4 inch thick, which is too thin to look like the original Bill Ellzey bookcase, so we added two-inch oak boards to the front of each horizontal and vertical element. Not only is this more esthetically pleasing, but the wide trim makes it possible install unobtrusive lights.

The trim around the adjacent door and all of the baseboards is vine trim purchased from Home Depot. We used a thinner version of the same trim on the bookcase.

During a search on the internet, we discovered these flexible LED light strips. You can cut the strip to various lengths with scissors. Peel the tape off the back and they stick to any surface you wish to illuminate.

 Our very own (partially filled) "Bill Ellzey bookcase."